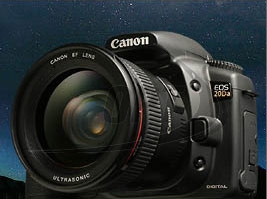
Canon EOS 20Da DSLR Camera
The Canon EOS 20Da was introduced to the U.S. market in 2005 as Canon's answer for the digital single lens reflex camera for astrophotography. This camera is essentially a Canon 20D which has been enhanced by Canon with features that astrophotographers would appreciate. With this camera, it is no longer necessary to purchase a DSLR and void the warranty by opening the camera to remove the built-in IR filter. The red sensitivity of this camera is higher than the previous Canon DSLR cameras' capabilities, and it also can be used for everyday photography.
The key features of the 20Da which were designed with astrophotography in mind are:
1. Live focus display on the LCD screen. This is a feature I have wanted to see for a long time on the Canon DSLR cameras. There are two modes of live focus available: normal and magnified. As you are focusing your scope with the camera mounted, you activate the live focus by setting the camera to manual or "Bulb" and turning the shutter speed dial to the left until the camera's top display shows "FC 1" (normal) or "FC 2" (magnified). Then press the shutter and the LCD screen on the back of the camera will show a live image. It is best to be pointing to a relatively bright star, such as a magnitude 2 since the live action of the screen will not pick up faint objects very well. Focus the scope until the image appears sharp on the camera's LCD screen. The shutter can also be activated remotely, either through Canon's remote control release, or by software.
2. Improved noise reduction. The noise reduction in the Canon 20Da works more efficiently than in other models. In addition, there is an option for long exposures to have the camera automatically take a dark frame and subtract it from the exposure before transferring the final image. Of course, exposure times will take longer, but you will never forget to take the dark frame with this feature activated. The camera first takes the exposure of the object you are focused on, then closes the shutter and takes another exposure for the same duration, subtracts that exposure from the first and transfers the final exposure. How many times have you forgotten to remove the OTA's cover after taking the dark frame? No more with this camera!
3. Increased red sensitivity. I have already mentioned this one, but it is important. The infrared (IR) filter, which is found in all digital cameras, has been replaced with a modified one that allows for more infrared light to reach the CCD sensor. This is critical when imaging nebulae, and the modified filter has been designed so that everyday pictures still produce acceptable color, something that would not be possible if the IR filter was removed completely. With no IR filter, standard photographs have an unacceptable pink hue. My own experience with taking everyday shots is that the color quality is more desirable than with other IR filter equipped cameras.
Combined with software that can control the camera from a PC and you have a simple to use and very high performing astrophotography solution. For software, I use DSLR Focus and Guidedog. Capturing of the image can be done either to the CompactFlash card in the camera, or it can be downloaded directly to the PC or both. To download to the PC, all you need is a USB 2.0 compatible cable. To get shutter control of more than 30 seconds, you need to have a serial or parallel cable from the PC to the camera's external remote plug. Please see Hap Griffin for remote control cables as well.
The camera connects to my Taurus-Tech Tracker III flip mirror system through a T-Ring adapter designed to connect an SLR camera with the Tracker III.
For a complete review of the Canon 20Da from Oceanside Photo and Telescope, click here.
For firmware updates to the Canon 20Da, please click here.
Return to Telescope and Equipment page
Return to Dale's Astronomy Page
This page was last updated on 11/26/2005